Bontrager GoTime Manual: A Comprehensive Guide
This guide provides detailed instructions for setting up and using your Bontrager GoTime cycling computer‚ ensuring accurate speed‚ distance‚ and time tracking.
The GoTime offers wireless connectivity and a user-friendly interface‚ with easy installation and configuration for optimal performance on every ride.
The Bontrager GoTime cycling computer is designed to enhance your riding experience by providing essential data at a glance. It’s a user-friendly device perfect for cyclists of all levels‚ from casual riders to those tracking performance metrics. This computer focuses on delivering core functionalities – speed‚ distance‚ and time – with the convenience of wireless technology.
Unlike more complex cycling computers‚ the GoTime prioritizes simplicity and ease of use. Setup is straightforward‚ and the large LCD screen ensures readability while you’re in motion. As noted‚ the GoTime is shipped without a battery installed to maximize shelf life‚ requiring a quick installation step before initial use.
This manual will guide you through every step‚ from battery installation and initial configuration to understanding the display and troubleshooting common issues. Whether you’re a seasoned cyclist or new to the sport‚ the GoTime aims to provide reliable data and a seamless riding experience.
What’s Included in the Box

Upon opening your Bontrager GoTime package‚ you should find several key components ensuring a successful setup and riding experience. The primary item‚ of course‚ is the GoTime cycling computer itself‚ featuring a clear LCD screen for displaying your ride data. Included alongside the computer is a handlebar mount‚ designed for secure and stable attachment to your bicycle’s handlebars.
Crucially‚ please note that the GoTime is shipped without a battery installed. You will need to provide a suitable battery (typically a CR2032) to power the device. The package also contains necessary mounting hardware‚ such as zip ties or O-rings‚ to firmly affix the computer to your bike.
While a detailed printed manual may not be included‚ access to the full user guide is readily available online through resources like ManualsLib‚ providing comprehensive instructions for installation‚ configuration‚ and troubleshooting.
Installing the Battery
Before you can begin enjoying the features of your Bontrager GoTime‚ installing the battery is a necessary first step. As shipped from the factory‚ the GoTime is designed to maximize shelf life by excluding the battery. Typically‚ the GoTime utilizes a standard CR2032 battery‚ which you will need to purchase separately if you don’t already have one.
Referencing the online manual (available on sites like ManualsLib)‚ locate the battery compartment on the back of the GoTime unit. Carefully open the compartment‚ usually by sliding a small cover or using a small screwdriver. Insert the CR2032 battery‚ ensuring correct polarity – positive (+) side up.
Once the battery is securely in place‚ close the compartment cover firmly. Avoid placing the computer back into any bands or mounts immediately after battery installation; proceed directly to the initial setup and configuration steps to ensure proper functionality.
Battery Installation Steps (Based on ManualsLib Information)
According to information sourced from ManualsLib‚ the battery installation process for the Bontrager GoTime is straightforward. First‚ locate the battery compartment on the rear of the device. This compartment is designed to be easily accessible for quick battery changes.
Next‚ carefully open the battery compartment cover. This may involve sliding a latch or gently prying it open – avoid using excessive force. Insert a fresh CR2032 battery‚ paying close attention to the polarity markings inside the compartment. The positive (+) side of the battery should face upwards‚ aligning with the indicated symbol.
Ensure the battery is securely seated within the compartment before closing the cover. Once closed‚ verify that the cover is firmly latched to prevent accidental dislodgement during use. Following these steps will ensure your GoTime is powered up and ready for your cycling adventures.
Initial Setup and Configuration
After successfully installing the battery‚ the initial setup of your Bontrager GoTime computer is crucial for accurate data collection. Begin by powering on the device; the screen should illuminate‚ displaying the main menu. The first step typically involves selecting your preferred language and units of measurement – kilometers or miles.
Next‚ you’ll be prompted to enter basic rider information‚ such as your weight. This data enhances the accuracy of certain calculations‚ like calorie expenditure. Following this‚ the GoTime will guide you through the wheel size configuration process‚ which is vital for precise speed and distance readings.
Ensure you select the correct tire size from the available options or manually input the wheel circumference. Completing these initial settings will optimize the GoTime for your specific needs and riding style‚ providing a personalized and reliable cycling experience.
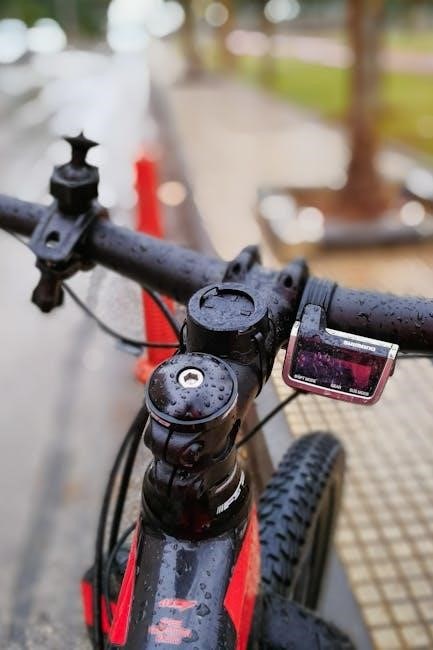
Mounting the GoTime Computer to Your Handlebars
Securely mounting your Bontrager GoTime computer to your handlebars is essential for safe and reliable operation. The GoTime typically includes a dedicated handlebar mount‚ often utilizing a rubber band or O-ring system for attachment. Begin by positioning the mount on your handlebars‚ ensuring it’s within comfortable viewing range while riding.
Wrap the rubber band tightly around the handlebars and the mount‚ securing it firmly in place. Avoid over-tightening‚ which could damage the mount or handlebars. Once the mount is stable‚ carefully slide the GoTime computer onto the mount until it clicks securely.
Verify the computer is firmly attached and doesn’t wobble during simulated riding movements. Adjust the mount’s angle if necessary to optimize visibility. A properly mounted GoTime will remain stable throughout your rides‚ providing uninterrupted access to your cycling data.
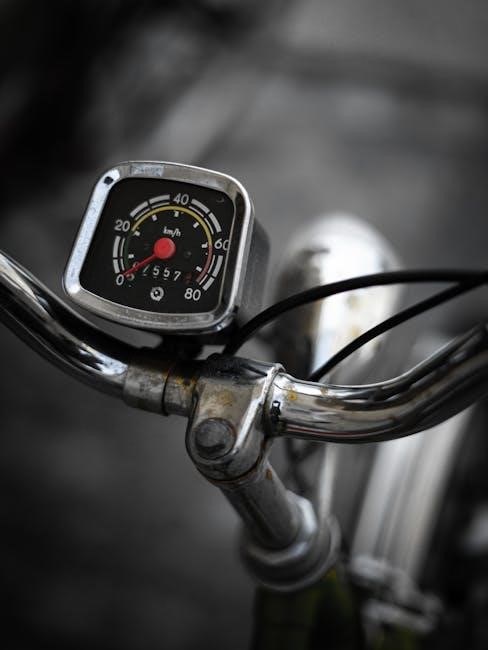
Understanding the Display Screen
The Bontrager GoTime features a large‚ easy-to-read LCD screen designed to display crucial cycling data at a glance. The screen is divided into several sections‚ each dedicated to specific information like speed‚ distance‚ and ride time. Familiarizing yourself with these sections is key to effectively utilizing the computer.
The primary display area typically showcases your current speed‚ while smaller sections provide cumulative distance traveled and total ride time. The screen may also include indicators for wireless connectivity status and battery life. Different modes will alter what information is prioritized on the display.
Pay attention to any icons present‚ as these represent specific functions or alerts. A clear understanding of the display layout will allow you to quickly interpret your cycling metrics and adjust your riding strategy accordingly‚ maximizing your performance and enjoyment.
Key Icons and Their Meanings
The Bontrager GoTime utilizes a series of icons to convey important information quickly and efficiently. A battery icon indicates remaining power; a low battery symbol prompts immediate charging. A wireless signal icon confirms successful pairing with sensors‚ while a flashing icon suggests a connection issue requiring attention.
Other icons may represent different riding modes‚ such as speed or distance tracking. Some models might display an icon for automatic pause/play functionality‚ indicating when the computer is recording ride data. Understanding these visual cues is crucial for optimal operation.
Refer to the complete manual for a detailed explanation of each icon. Ignoring these symbols could lead to inaccurate data or missed features. Regularly checking the display for these indicators ensures a smooth and informed cycling experience.
Basic Functions: Speed‚ Distance‚ and Time
The Bontrager GoTime excels at providing core cycling metrics: speed‚ distance‚ and ride time. Speed is displayed in your preferred units (mph or km/h)‚ offering real-time feedback on your pace. Distance tracking accurately measures your total ride length‚ allowing you to monitor progress towards goals.
Ride time is automatically recorded from the moment you begin cycling‚ providing a clear duration of your activity. These fundamental functions are easily accessible through the GoTime’s intuitive interface. The large LCD screen ensures readability while riding‚ even in bright sunlight.
These basic functions form the foundation of your cycling data‚ enabling you to analyze performance and track improvements over time. Consistent monitoring of these metrics is key to effective training and enjoyable rides.
Wireless Connectivity and Sensor Pairing
The Bontrager GoTime utilizes wireless technology for seamless data transmission‚ enhancing your cycling experience. It readily pairs with compatible sensors‚ including heart rate monitors and cadence sensors‚ to provide a more comprehensive view of your performance.

Pairing these sensors is a straightforward process‚ typically initiated through the GoTime’s menu system. The computer searches for nearby signals‚ allowing you to select and connect to your desired devices. Once paired‚ data from these sensors is automatically displayed on the screen.
This wireless connectivity eliminates the need for cumbersome wires‚ offering a clean and uncluttered setup. Reliable sensor pairing ensures accurate and consistent data collection‚ empowering you to optimize your training and track your progress effectively.
Setting Up Wheel Size for Accurate Readings
Accurate wheel size calibration is crucial for the Bontrager GoTime to provide precise speed and distance measurements. The computer needs to know your wheel’s circumference to correctly calculate these metrics. Incorrect settings will lead to inaccurate data‚ impacting your ride analysis.
The GoTime allows you to manually input your wheel size‚ typically measured in millimeters. You can find this information printed on your tire sidewall or by measuring the wheel’s circumference directly. Access the wheel size setting through the computer’s menu system.
Carefully enter the correct value‚ ensuring it matches your specific wheel and tire combination. Double-check your entry before saving. Proper wheel size setup guarantees reliable data‚ allowing you to confidently track your speed‚ distance‚ and overall cycling performance.
Navigating the Menu System
The Bontrager GoTime features an intuitive menu system‚ accessed via button presses on the computer unit. Understanding this system is key to customizing settings and accessing advanced features. Typically‚ a dedicated ‘Menu’ or ‘Mode’ button initiates navigation.

Use the up and down buttons to scroll through the available options‚ such as wheel size‚ time/date settings‚ and sensor pairing. Selecting an option usually involves a short press of the ‘Select’ or ‘Enter’ button. To return to the previous menu‚ look for a ‘Back’ or ‘Return’ function.
Familiarize yourself with the menu structure to efficiently adjust preferences. The display will clearly indicate the currently selected option. Experimenting with the menu is encouraged to fully grasp its functionality and unlock the GoTime’s potential.
Adjusting Display Settings (Brightness‚ Contrast)
Optimizing the display settings on your Bontrager GoTime ensures clear visibility in varying lighting conditions. Access these settings through the main menu‚ typically found under a ‘Display’ or ‘Settings’ section. Use the navigation buttons to locate the brightness and contrast controls.
Brightness adjustment allows you to increase or decrease the backlight intensity. Higher brightness is ideal for direct sunlight‚ while lower settings conserve battery life in dimmer environments. Contrast controls fine-tune the clarity of the displayed information.
Experiment with different combinations to find the optimal settings for your preferences and riding conditions. A well-adjusted display enhances readability and improves your overall riding experience. Remember to save any changes made within the menu system.
Troubleshooting Common Issues

Encountering issues with your Bontrager GoTime? This section addresses frequently reported problems and provides solutions. A common issue is the computer failing to power on. Ensure the battery is correctly installed and sufficiently charged – the GoTime ships with the battery not installed to maximize shelf life.
Incorrect speed readings often stem from improper wheel size configuration. Verify your wheel size setting within the menu‚ referencing your bicycle’s specifications. Sensor pairing problems can also cause inaccurate data; re-pair the sensors following the initial setup instructions.
If the display freezes‚ attempt a reset by briefly removing and reinserting the battery. For persistent problems‚ consult the full manual or contact Bontrager support for further assistance. Regular maintenance and proper care can prevent many issues.
Problem: Computer Not Turning On
If your Bontrager GoTime computer isn’t powering on‚ the first step is to verify the battery installation. Remember‚ the GoTime is shipped with the battery deliberately not installed to preserve its lifespan. Ensure the battery is correctly seated within the compartment‚ observing the correct polarity as indicated;
A depleted battery is another common cause. Connect the GoTime to a suitable USB power source for charging‚ allowing sufficient time for it to replenish. Check the charging indicator (if available) to confirm it’s receiving power. If charging doesn’t resolve the issue‚ try a different USB cable and power adapter.
In rare cases‚ a complete reset might be necessary. Briefly remove and reinsert the battery to attempt a soft reset. If the problem persists‚ contact Bontrager support for further troubleshooting guidance.

Problem: Incorrect Speed Readings
If your Bontrager GoTime displays inaccurate speed readings‚ the most frequent cause is an improperly configured wheel size. Navigate to the ‘Settings’ menu and carefully verify that the wheel circumference matches your bicycle’s wheel size. Incorrect values will directly impact speed and distance calculations.
Ensure the computer is correctly paired with any wireless speed sensors. Check the sensor pairing status within the GoTime’s menu. If the sensor isn’t connected‚ re-pair it following the instructions in the ‘Wireless Connectivity’ section of this manual.
External factors like strong magnetic interference can occasionally disrupt sensor signals. Try relocating the sensor or computer slightly. If issues persist‚ confirm the sensor battery is fresh and functioning correctly. A faulty sensor may require replacement.
Battery Life and Charging
The Bontrager GoTime is designed for extended use‚ offering a substantial battery life on a single charge. Typical usage provides weeks of operation‚ though this varies based on display brightness‚ wireless connectivity frequency‚ and data logging intervals. To maximize battery life‚ reduce screen brightness and minimize sensor pairing when not actively riding.
The GoTime utilizes a rechargeable battery‚ conveniently charged via a standard micro-USB connection. A full charge typically takes several hours‚ indicated by a charging icon on the display screen. Avoid exposing the computer to extreme temperatures during charging.
A low battery indicator will appear on the screen when power is running low‚ prompting you to recharge. It’s recommended to charge the device before it completely depletes to ensure uninterrupted ride data recording.
Care and Maintenance
To ensure the longevity and optimal performance of your Bontrager GoTime‚ regular care and maintenance are essential. Clean the computer’s display and housing with a soft‚ damp cloth. Avoid using harsh chemicals or abrasive cleaners‚ as these can damage the screen or casing.
When not in use‚ store the GoTime in a cool‚ dry place‚ away from direct sunlight and extreme temperatures. Protect it from impacts and excessive moisture. Regularly check the handlebar mount for secure attachment‚ tightening as needed to prevent accidental detachment during rides.
Avoid prolonged exposure to rain or submersion in water‚ as the GoTime is water-resistant‚ not waterproof. Inspect the USB charging port for debris and clean gently if necessary. Proper care will keep your GoTime functioning reliably for years to come.
Resources and Further Support
For additional assistance beyond this manual‚ several resources are available to support your Bontrager GoTime experience. Visit the Trek Bicycle Corporation website – the parent company of Bontrager – for frequently asked questions‚ downloadable manuals‚ and troubleshooting guides. You can often find helpful information in their support section.
Local Trek retailers and authorized Bontrager dealers are excellent sources of expertise. They can provide in-person assistance with setup‚ configuration‚ and any issues you may encounter. SouthWest Bicycles‚ for example‚ offers support and sells the GoTime.
Online cycling communities and forums can also be valuable for sharing tips‚ resolving problems‚ and connecting with other GoTime users. Remember to consult official Bontrager documentation for the most accurate and up-to-date information regarding your device.